Make a BGP Operating stepsExplained below are the operating steps for making a BGP.
1
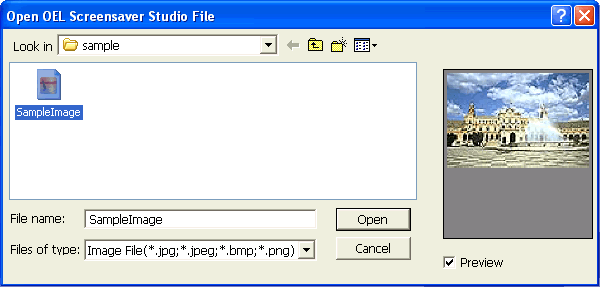 Click Open on the top left of the screen. Select the image file you would like to capture. 2
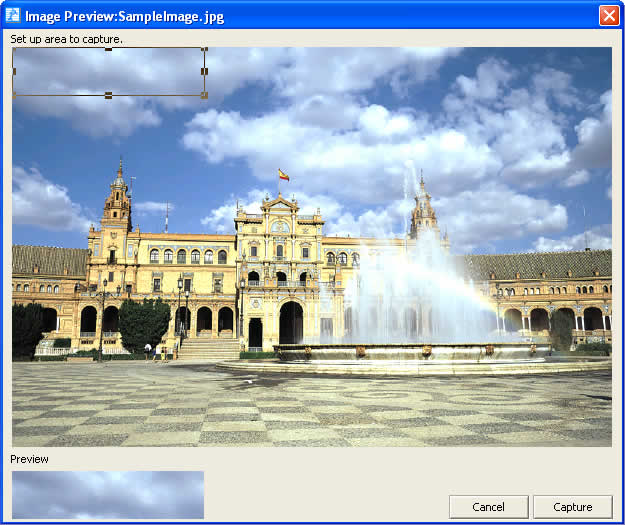 When you have selected the image, this preview screen appears. Partition the area you would like to use with frames in this screen. When you click inside and drag these frames you can move them. Additionally, when you click on one of the four corners or near the center, you can enlarge or shrink the frame. When you drag the frames while pressing Shift, all of the frame sides will enlarge or shrink equally. A preview of the cut out is generated at the lower left of the screen. Refer to this preview while adjusting the frame position and size. Place a frame around the area you would like to cut out and click the Capture button. 3
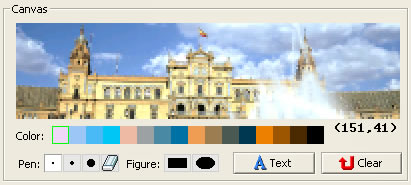 The captured image displays on the canvas. You can paint on the image here. You can paint when you have selected thickness and a figure in the pen tip settings, selected color and have dragged on top of the image. Additionally, when you set the pen tip to eraser, you can erase the areas that you have painted. When you click Clear, you can erase all of the area that you have painted up to that point. (Text you have input is not that same as areas that have been and painted, and it cannot be erased by the eraser or Clear. To erase the text see step 4.) 4
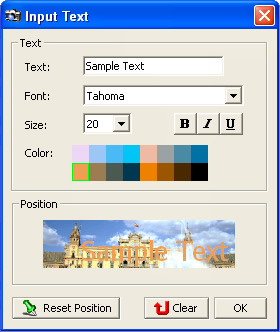 When you want to input text, click on Text. This type of screen is displayed. Input the text and set the font and size, as well as bold, italics, underline and color in text settings. When the text settings are done, set where the image will be positioned. Drag the text to position it. When you click Reset Position, the text will be repositioned at the top left of the image, in their initial display position. When all the settings are complete, click OK. When you wish to erase text that you have inserted, click on Clear. 5
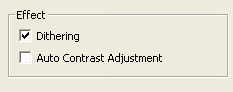 When the paint and text settings are complete, set Effect. Dithering refers to the method used when expressing the many color tones of a few colors and has a compensating effect for similar colors. In Auto Contrast Adjustment you can adjust the contrast of an image. This is effective when an image is too bright or too dark. 6
When all the procedures are finished, click Save. 7
 The file that you have saved is an LKD file and is a unique file format to OEL Screensaver Studio. You cannot use this file in any other application. The LKD file is a movie or picture file that displays on the car audio. When actually sending files to your car audio, you must organize and convert the files you want to send into the LKA file format. Read below for more information on LKA files. 8
When you save the LKD file, the LKA file creation screen is displayed and the message Saved is displayed. Click OK and the message Continue? displays. When you click Yes the Make a BGP screen appears. Click No to display the LKA creation screen. |